Creating Offset Cage in NX Realize Shape will become very easy with this Tech Tip. The Offset Cage allows you to select cage faces and offset them at a specified distance proportionately. The offset cage faces are not associative.
Follow the video and steps to know more –
Step 1
Begin by going to the ribbon bar and selecting Surface tab > Realize Shape group > NX Realize Shape to enter the Realize Shape task environment.

Step 2
Next, go to the Home tab > Create group > Primitive Shape to display the Primitive Shape dialog.
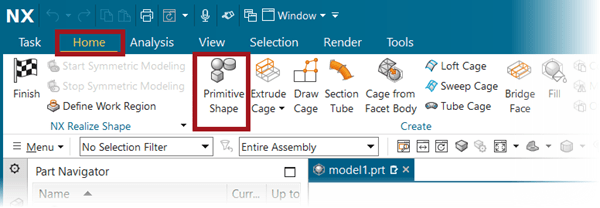
Step 3

The Primitive Shape dialog appears.
Step 4
Ensure the Type drop-down at the top of the dialog is set to Sphere.
You can place the sphere anywhere in the graphics window and select any you want to create. For this lesson, we will concentrate on offsetting the sphere shape.
Click OK to create the sphere.

Step 5
Next, you will give the sphere a little shape.
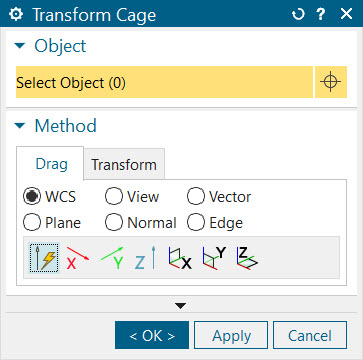
Select Home tab > Modify group > Transform Cage to display the Transform Cage dialog.
Step 6
Display the Drag tab in the Method pane and
click YC-ZC

Step 7

Click and drag the front cage face approximately as shown.
Step 8
Click OK to complete the transform.

Step 9

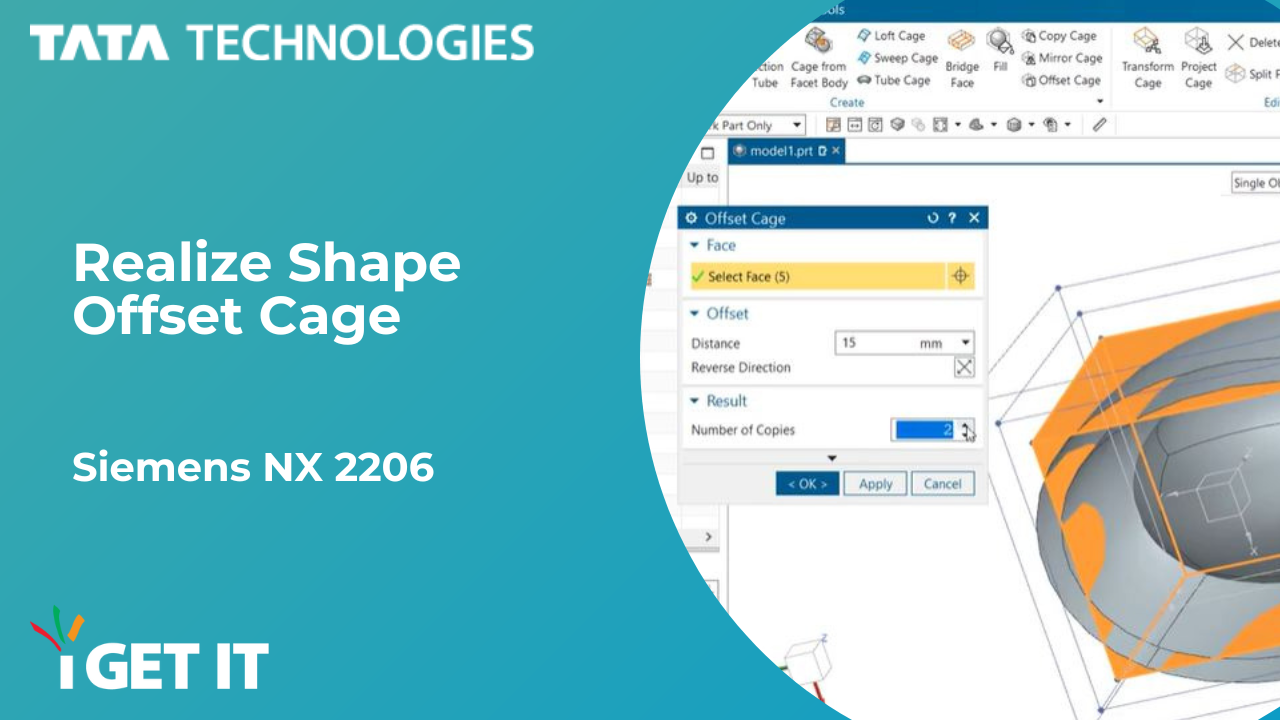
Select Home tab > Create group > Offset Cage to display the Offset Cage dialog.
Step 10
The Select Face selection step should be selected, holding the CTRL key on the keyboard, pick five of the six faces as shown.
This demonstrates how faces offset while the original model is inside the offset model.
You can also reverse the direction of the offset and it and place them inside your original model.

Step 11

Next enter 10 for Distance and press ENTER.
Step 12
Click OK to complete the offset.
Notice how the offset model is 10 mm from the original model.

About i GET IT
i GET IT is our Tata Technologies eLearning solution designed to teach engineers how to be better in using today’s leading MCAD (Mechanical Computer Aided Design) applications and design skills.
For more tech tips and in-depth eLearning for Siemens NX, including this and new courses on other design solutions, please visit https://www.myigetit.com. You can sign up and get FREE Subscription when joining through SkillAdvisor to get our informative Newsletter.
Start your upskilling journey!
If you should have any questions, please reach out to iproducts@tatatechnologies.com or igetitsocial@tatatechnologies.com for help.


Leave a Reply